Ray
Introduction
Ray is a library to write games in Ruby. It uses a DSL meant to be fun to use. Here’s, for example, a “Hello world” written using Ray:
require 'ray'

Ray.game "Hello world!" do
  register { add_hook :quit, method(:exit!) }

  scene :hello do
    @text = text "Hello world!", :angle => 30, :at => [100, 100], :size => 30
    render { |win| win.draw @text }
  end

  scenes << :hello
end
And this is not all Ray is capable of; here are some screenshots of what can be achieved with it:
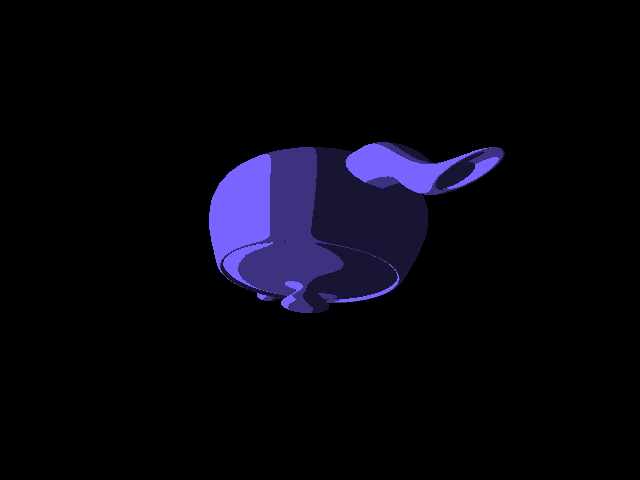
(Yes, it can do 3D as well.)
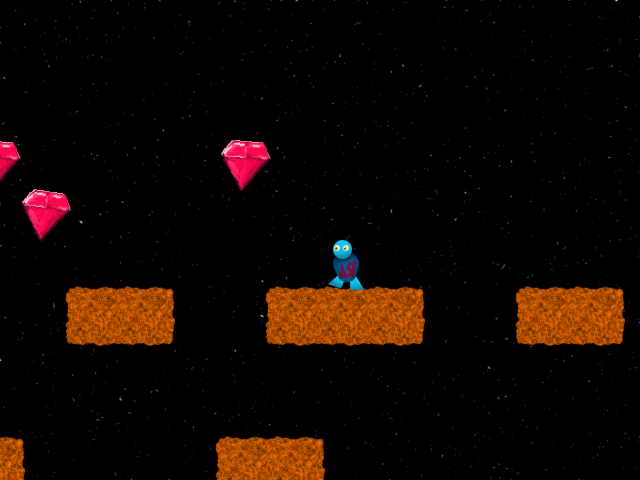
The code is available on Github, with many samples.
Installation
Installing Ray itself should be quite easy. It’s just a gem. It requires, however, a compiler (tested with RubyInstaller’s devkit on Windows). On all the platforms but Windows you will need a few dependencies:
- GLEW
- libsndfile
- Freetype (already installed on OS X)
- Xlib (not needed on OS X)
- OpenAL (already installed on OS X)
- OpenGL (already installed on OS X)
Here’s how you could install them:
pacman -S glew libsndfile freetype2 openal # Archlinux

# OSX
port install glew libsndfile # or...
brew install glew libsndfile
Once you have this, you can run the normal installation command:
gem install ray
Starting
In the “Hello World!”, just like in any Ray game, the first thing that happens is… the creation of the game. A game is an object that will handle all the scenes used in your game, and create a window. The scenes it handle each represent a different screen shown to the user. For instance, you could have a scene for the main menu, one for the game itself, and another for the in-game menu.
A game can be created like this:
game = Ray.game "My game"
Other options can be passed to Ray.game. You could change the size of the
created window:
game = Ray.game "My game", :size => [800, 800] # Or...
game = Ray.game "My game", :size => Ray::Vector2[800, 800]
The game can then be run with game.run. Another way to do it is to pass a
block to Ray.game:
Ray.game "My game", :size => [800, 800] do
  # ...
end
Either way, nothing will happen: there are no scenes to display, which means Ray
considers the game is done running. It is needed to define a scene, using
Ray::Game#scene. Notice the block passed to Ray.game is run with
instance_eval.
scene :some_scene do
  # ...
end
The scene is now registered and called :some_scene. However, it needs to
be put on the stack of scenes that must be displayed. The last item of that
stack is the currently running one. You can push and pop a scene from the stack,
using push_scene and pop_scene. The stack is a Ray::SceneList object
which you can also access directly:
scenes << :some_scene # Or..
push_scene :some_scene
Now, the code is nearly working. There’s still one missing step: we are
currently unable to quit the game. Ray::Game#exit! should be called when the
user tries to close the window, which you are notified about by a :quit
event.
To run a block when an event occurs, you can use #on:
on :event_name do
  # ...
end
Arguments may be passed to an event. They will also be passed as arguments to the block. They could be used to know which key was the one that was pressed:
on :key_press do |key, mods|
  # ...
end
One can also register a block which will only be called when its arguments meet
a condition, verified using #== then #===, as in the following example
which runs a block when the “p” key is pressed:
on :key_press, key(:p) do
  # ...
end
In our case, we can also use #add_hook. Its parameters are the same as
#on’s, but, instead of using a block, its last argument must be an object
responding to #call.
add_hook :quit, method(:exit!)
This is still not it. You must register again for all the events when the scene
is changed. This what the register method is for: specifying a block to be
run every time you must register to events.
This is what the code looks like, now:
require 'ray'

Ray.game "My game", :size => [800, 800] do
  register { add_hook :quit, method(:exit!) }

  scene :some_scene do
  end

  scenes << :some_scene
end
The code can now be run. The result is a black window, on which you may want to learn to draw…
Drawing
There are two kinds of objects that are used when drawing:
-
Targets. They are what you are currently drawing on. This means the window (
Ray::Window) most of the time, but it can also be an image (Ray::ImageTarget). -
Drawables. They are what you draw on the targets. Ray currently provides 3 kinds of drawables: Sprites (used to draw images), texts, and polygons. It is also possible to create your own drawable class.
Rendering happens in the render method of each scene, just like in the
“Hello world!” example:
render do |win|
  # You ask the target to draw each object.
  win.draw @text
end
Let’s introduce all of the drawable classes now.
Polygons
They may seem like the simplest objects you can draw: you just provide Ray with a bunch of points, and it joins them, filling its content. Notice this only is only guaranteed to work with convex polygons.
You can create some of the most common polygons using some class methods:
Ray::Polygon.rectangle([0, 0, 40, 40], Ray::Color.red)
Ray::Polygon.circle([200, 40], 30, Ray::Color.green)
Ray::Polygon.line([70, 70], [500, 300], 10, Ray::Color.new(127, 40, 80))
Ray::Polygon.ellipse([300, 600], 100, 50, Ray::Color.yellow)
What you create when you call circle is just a polygon with many
points. ellipse is just the same as circle, except it also scales the
object. This can be pointed at in IRB:
circle = Ray::Polygon.circle([200, 40], 30, Ray::Color.green)
circle.size # => 40

ellipse = Ray::Polygon.ellipse([300, 600], 100, 50, Ray::Color.yellow)
ellipse.scale # => (1, 0.5)
Notice that Ray uses Vector2 to represent points and sizes, as well as
scaling factors; similarily it uses Vector3 for points in 3D space and
Rect for rectangles. Ray can convert objects (most of the time, arrays) to
those using #to_vector2, #to_vector3, and #to_rect.
If you need another shape than those, you can just use #add_point as much as
you need. Here’s for instance a triangle:
def triangle(a, b, c)
  tri = Ray::Polygon.new
  tri.add_point(a, Ray::Color.red)
  tri.add_point(b, Ray::Color.green)
  tri.add_point(c, Ray::Color.blue)
  tri
end
This is how it would like like, because Ray interpolates colors:

A border whose color will also vary can be added, too:
poly.outline_width = 5
poly.add_point(pos, color, outline_color)
Already added points can be changed:
poly[0].color   = Ray::Color.red
poly[0].outline = Ray::Color.blue
poly[0].pos     = [30, 15]
And the shape can be configured to draw or not to draw the border or the content of the polygon:
poly.filled   = false
poly.outlined = true
You can try to move, resize, or rotate this polygon:
poly.scale = [0.5, 3]
poly.pos   = [100, 100]
poly.angle = 70
Those methods that affect the transformations are available to all the drawables objects. Here’s a list of them:
- origin: Origin of all of the transformations, including translations.
- pos: The position of the object, a translation (in pixel, at least by default).
- angle: In degrees, determines the rotation applied to the object.
- scale: Multiplies the size of the object.
- matrix: This one overrides all of the previous parameters when you set it. It tells Ray to use an arbitrary transformation matrix. It is unlikely you will need this, though.
Sprites
Sprites aren’t standalone objects. You can’t just create a sprite from nothing and draw it. It needs an image to draw.
Images will most of the time be loaded from files. Ray keeps a cache of those
images for you, which you can use with the image helper method (defined in
Ray::Helper):
a = image "foo.png"
b = image "foo.png"
a.equal? b # => true
You can also create an image just from its size and edit it manually:
image = Ray::Image.new [100, 100]
image.size # => (100, 100)
image[10, 10] = Ray::Color.red

# Images are enumerable
image.each do |pixel|
  # work
end
Or, more efficiently, you can draw drawables on it:
image_target image do |target|
  target.clear color

  target.draw some_object

  # Without this call, result of drawing would not be pushed to the
  # image.
  target.update
end
Notice that you probably don’t want to modify images from the cache. It’d be
better to draw on a copy of the image, which you can get using #dup:
image.dup
Sprites, now, can be created just with a reference to the image or a filename:
sprite image
sprite "foo.png"
They also have many attributes: for instance, you can flip them:
sprite.flip_x = true
A more often used attribute, though, is that you can decide to draw only a part of them. This is useful if you have one file that actually contains several images you will always draw separately.
# Defines the rect that will be shown
sprite.sub_rect = [10, 10, 50, 50]

# Often, you'll just want to split the image in rects of equal size and be
# able to switch quickly between each rect.
sprite.sheet_size = [4, 4] # 4 rects wide and long
sprite.sheet_pos  = [1, 2] # Selects second sprite of the third line
Texts
Texts work similarly to sprites. They use fonts instead of images to get drawn. However, Ray also provides a default font, to be able to draw text even without having a font file.
font "foo.tttf" # cached
Ray::Font.default
A helper method to create text is available; it is similar to #sprite:
text "content", :font => "foo.ttf"
If you omit :font, the default font will be used instead. Notice also that
Ray can handle non-ascii (e.g. UTF-8) characters just fine.
Events
As shown previously, a block can be registered to be called when an event
occurs. A game must register by passing a block to register, whereas this is not
needed with a scene, since the block passed to #scene will be called more
than once.
Scenes raise events when the user moves the mouse, pushes a button, etc.
| Event | Arguments | Description |
|---|---|---|
| :quit | None | The user tried to close the window |
| :focus_gain | None | The window gained focus |
| :focus_loss | None | The window lost focus |
| :mouse_entered | None | The mouse entered the window |
| :mouse_left | None | The mouse left the window |
| :mouse_motion | pos | The mouse was moved |
| :wheel_motion | pos, delta | The mouse wheel was moved |
| :mouse_press | button, pos | A mouse button was pressed |
| :mouse_release | button, pos | A mouse button was released |
| :key_press | key, mod_keys | A key was pressed |
| :key_release | key, mod_keys | A key was released |
| :window_resize | size | The window was resized |
| Argument | Class | Description |
|---|---|---|
| pos | Ray::Vector2 | Position of the mouse |
| delta | Float | Difference with the previous value |
| button | Symbol | Mouse button (:left, :middle, :right, :extra1, :extra2) |
| key | Integer | Code of a key |
| mod_keys | Integer | Byteflag of pressed modifiers (shift, alt, control) |
| size | Ray::Vector2 | New size of the window |
Notice you don’t need to use the key code directly. Ray::Helper#key returns
a Key object, using a key name:
on :key_press, key(:left) do
  # ...
end
Same for #key_mod, with :ctrl, :shift, or :alt:
on :key_press, key(:left), key_mod(:ctrl) do
  # ...
end
There’s another event that can be useful: text_entered. It is raised when
the users presses on keys that match a character. In Ruby 1.9, encoding is set
correctly. In 1.8, it will probably be useful to convert it to another encoding,
as UTF-32 is used by Ray. Ray provides helper methods that work both on 1.9 and
1.8 to convert the string to the encoding of your choice (defaulting to UTF-8):
on :text_entered do |char|
  p Ray::TextHelper.convert(char)
end
It’s also worth nothing that in the case of resize events (which will only occur if you set the resizable parameter to true when you created the game), you will most likely want to adapt Ray’s projection to the window size, which doesn’t happen automatically (for fear that Ray would erase some of your precious data):
on :window_resize do |size|
  # Default view still will be updated.
  window.view = window.default_view
end
Those events are what makes the game interactive. You can now write programs that react to user input:
require 'ray'

Ray.game "Test" do
  register { add_hook :quit, method(:exit!) }

  scene :square do
    @rect = Ray::Polygon.rectangle([-10, -10, 20, 20], Ray::Color.red)

    on :mouse_motion do |pos|
      @rect.pos = pos
    end

    render do |win|
      win.draw @rect
    end
  end

  scenes << :square
end
Scenes
Scenes can do more than what was already mentioned. For instance, one can do something every time the scene is rendered:
always do
  puts "here again"
end
And by running this program, you’ll see this message printed 60 times per second. That’s because Ray blocks frame rate to 60 frames per second by default. This limit can be changed or removed:
self.frames_per_second = 10
self.frames_per_second = nil
When using #always, you may want to know if a key is pressed right now. One
way would be to keep track of pressed keys:
@holding_a = false

on :key_press, key(:a) do
  @holding_a = true
end

on :key_release, key(:a) do
  @holding_a = false
end

always do
  puts "holding a" if @holding_a
end
But Ray can do it for you:
always do
  puts "holding a" if holding? :a
end
An important step in the lifetime of a scene is the one where it cleans up what’s not needed anymore. For instance, you can free images you don’t need anymore:
clean_up do
  Ray::ImageSet.delete_if { |name, img| used_images.include? name }
end
Subclassing Ray::Scene
When having many scenes, putting all of their content in a single file is not quite easy to maintain. Ray allows to separate them in different classes:
class MyScene < Ray::Scene
  scene_name :my_scene

  def setup
    @sprite = sprite "img.png"
  end

  def register
    on :key_press, key(:return) do
      pop_scene
    end
  end

  def render(win)
    @sprite.draw_on win
  end

  def clean_up
    @sprite = nil
    Ray::ImageSet.clear
  end
end

Ray.game "test" do
  MyScene.bind(self)
  scenes << :my_scene
end
Managing scene stack
You can push scenes to a stack and pop them from it using push_scene and
pop_scene. This is however not enough in some cases. You may for instance
want to run a scene and come back to where you were before, without running
setup and register again. This can be done with run_scene, which won’t
return until the new scene is done running:
 on :key_press, key(:m) do
   run_scene :menu # won't return until the end of the menu scene
 end

 on :key_press, key(:p) do
   push_scene :pause # returns instantaneously
 end
Event groups
Another feature to keep in mind is the ability to group evenets: you may want one scene to react differently to events depending on its state. Here’s an example:
 event_group :move do
   [:up, :down, :left, :right].each do |dir|
     on :key_press, key(dir) do # Move the player
       @player.move_towards dir
     end
   end

   on :key_press, key(:space) do
     @menu.show # Show the menu

     # Toggle groups
     enable_event_group  :select
     disable_event_group :move
   end
 end

 event_group :select do
   on :key_press, key(:up) do # Change selection
     @menu.previous
   end

   on :key_press, key(:down) do
     @menu.next
   end

   on :key_press, key(:space) do
     @menu.hide # Hide the menu

     # Toggle groups
     disable_event_group :select
     enable_event_group  :move
   end
 end

 disable_event_group :select # Disable selection by default
Animations
If you want to move an object, you can just write something like:
object.pos += [30, 40]
However, the object will directly be moved. Animating the object moving would be much nicer. Ray has an animation class for this. So, this is the translation described above, with a duration of 3 seconds:
anim = translation(:of => [30, 40], :duration => 3)
Ray provides many other animations, like sprite animations, combinations, rotations, color variation, etc.
Now, you need to start the animation by passing a target to it — an animation can be used several times with different targets.
anim.start object
This isn’t enough for the change to be applied. You need to update the animation
often, usually by using the block passed to always:
always do
  anim.update
end
Notice animations can be paused and resumed:
anim.pause
anim.resume
As most of the time, all you need to do once the animation was started is updating it, there’s an animation list to which you can just add your animation to get automatic updates:
animations << anim
There are also two methods you can call once you started your animation to
change how it will be executed: loop!, which will cause it to be repeated
over and over, and bounce!, which will cause the animation and an
animation reversing its effect to alternate.
Creating custom animations
The speed of that translation is constant. If we wanted an acceleration to be applied to the animation, we’d have to implement it manually.
class AcceleratedTranslation < Ray::Animation
  register_for :accelerated_translation
end
This is enough to define Ray::Helper#accelerated_translation, which returns
an instance of our class. It also calls setup on our object to define
parameters which don’t depend on our target:
def setup(opts)
  self.duration = opts[:duration]

  @variation     = opts[:of].to_vector2
  @initial_speed = opts[:speed]

  distance = Math.sqrt(@variation.x ** 2 + @variation.y ** 2)

  @cos_angle = @variation.x / distance
  @sin_angle = @variation.y / distance

  # dist = Vi * t + (a * t ** 2) / 2
  # 2(dist - Vi * t) / t ** 2 = a
  @acceleration = 2 * (distance - @initial_speed * duration) / duration ** 2
end
This code uses the hash we pass to accelerated_translation to define
parameters we’ll use later.
Every time the animation is started, it needs to note the initial position of its target:
def setup_target
  @initial_pos = target.pos
end
Now, the main part of the animation is the method which will update the position
of the target. We can get the progression of the animation as a number between 0
and 1 using the progression method.
def update_target
  target.pos = @initial_pos + current_variation
end

def current_variation
  ellapsed_time = progression / * duration

  current_distance = (@initial_speed * ellapsed_time) +
    (@acceleration * ellapsed_time ** 2) / 2

  Ray::Vector2[@cos_angle * current_distance, @sin_angle * current_distance]
end
And you can now try this animation:
Ray.game "Accelerated translation" do
  register { add_hook :quit, method(:exit!) }

  scene :test do
    @red_rect  = Ray::Polygon.rectangle([-25, -25, 50, 50], Ray::Color.red)
    @blue_rect = Ray::Polygon.rectangle([-25, -25, 50, 50], Ray::Color.blue)

    animations << accelerated_translation(:of => [200, 400], :speed => 0,
                                         :duration => 3).start(@red_rect)
    animations << translation(:of => [200, 400], :duration => 3).
      start(@blue_rect)

    render do |win|
      win.draw @red_rect
      win.draw @blue_rect
    end
  end

  scenes << :test
end
Views
Views are cameras allowing to change what parts of the world are shown to the user. Typically, you would use them to implement scrolling easily.
Every single target has a default view that depends only on its size. Here’s what the one of the windows we used previously look like:
#<Ray::View center=(320, 240) size=(640, 480) viewport=((0, 0), (1, 1))>
-
centeris the position of the point that will be mapped to the center of the screen. -
sizeis the amount of units one can see on the screen. -
viewportis a rectangle that tells Ray where to draw on the target, using coefficients between 0 and 1.
If you multiply components of the viewports by the size of the target in pixels, you’ll get the actual viewport which will be used. You’d then notice its size is equal to the size of the viewport. This means one game unit is mapped to one pixel. Thus, everything is rendered without scaling.
If you make the size greater, you map more game units to the same amount of pixels. One game unit would therefore represent less pixels, and everything would appear smaller. Similarly, if you make the size smaller, it will map less game units to the same amount of pixels, therefore making each game unit represent more pixels. Everything would thus appear bigger.
Because this may sound confusing, Ray provides methods to just multiply and divide the size of the view:
view.zoom_by 2
view.size # => (320, 240)

view.unzoom_by 4
view.size # => (1280, 960)
If you need to find what are the coordinates of the viewport for a given rect in
pixel, you can just use Target#viewport_for:
target.viewport_for [10, 10, 100, 100]
Here’s an example displaying a sprite at the center of the screen and the same sprite in a smaller rect, where we zoomed on the sprite:
require 'ray'

Ray.game "View" do
  register { add_hook :quit, method(:exit!) }

  scene :view do
    @sprite = sprite "sprite.png"

    # Notice both default_view and view actually return copies of the views
    # used internally.
    @normal_view = window.default_view
    @normal_view.center = @sprite.rect.size / 2

    @zoomed_view = @normal_view.dup
    @zoomed_view.viewport = [0.05, 0.05, 0.2, 0.2]
    @zoomed_view.zoom_by 10

    render do |win|
      win.with_view @normal_view do
        win.draw @sprite
      end

      win.with_view @zoomed_view do
        win.draw @sprite
      end
    end
  end

  scenes << :view
end
Should you ever need to do more advanced stuff, you can set matrix to apply
any effect you like. In 3D, for example, you can setup a perspective projection:
view.matrix = Ray::Matrix.perspective(90, 640.fdiv(480), 1, 10)
Shaders
Shaders are a fun way to apply cool effects to the screen. They require some more knowledge about OpenGl and are quite low-level, though. They are written in GLSL (which looks a lot like C), but I won’t teach you the language here.
Ray knows about 3 kinds of shaders: fragment, vertex, and geometry shaders. It also uses two GLSL version: the deprecated one (before GLSL 1.30) and the new one (as of GLSL 1.30). If you want to force Ray to use old style shaders, call the following method:
Ray::Shader.use_old!
Uniforms
Here’s a list of uniforms set by Ray:
| Name | Type | Description |
|---|---|---|
in_ModelView |
mat4 |
Transformations applied to the current object |
in_Projection |
mat4 |
Projection matrix |
in_Texture |
sampler2 |
Texture to be used when drawing |
in_TextureEnabled |
bool |
True if texturing is enabled |
Fragment shaders
They come first because they are what you’ll need most of the time in 2D. You are given the following input (as varyings in pre 1.30 GLSL):
| Name | Type | Description |
|---|---|---|
var_Color |
vec4 |
Color of the point |
var_TexCoord |
vec2 |
Position in the texture |
In deprecated style they are expected to output to gl_FragColor. In new style, Ray binds the output to out_FragColor.
Vertex shaders
Their input depends on the vertex type currently in use. The default is written as follows:
| Name | Type | Description |
|---|---|---|
in_Vertex |
vec2 |
Position of the vertex |
in_Color |
vec4 |
Color of the vertex |
in_TexCoord |
vec2 |
Position in the vertex |
They’re just expected to output to what’s the input of fragment shaders.
Geometry shaders
There’s not much to say about them, except that Ray doesn’t provide a way to manually tell GL what input they expect and what they output. You need to use the new style to specify this right into the code of the shader.
Usage from Ruby
You can get the shader of a view and recompile it to use your own code. Notice
#shader does not return a copy of the shaders (shaders, in fact, cannot be
copied).
 # omitted arguments (like :geometry below) mean "keep the shader used
 # currently".
 window.shader.compile :frag => "file.glsl", :vertex => "vertex.glsl"

 # You can use IOs or StringIOs too.
 window.shader.compile :frag => StringIO.new(<<-shader)
   /* Work! */
 shader
You can also create your own shader with Ray::Shader#new and ask a drawable
to use it.
# arguments are forwarded to #compile
shader = Ray::Shader.new(:vertex => "...")

object.shader = shader
You’ll probably want to set your own uniforms when writing more complex
shaders. This can be done using the #[]= method:
 shader[:foo] = [0, 1, 2]
 shader[:bar] = 32.0
Ray allows to set uniforms of many types, but not arrays that contain more than 4 floats, or that contain something else than float. You’ll need to fill them manually:
# Assuming array is an array of vec3.
shader["array[2]"] = [0.1, 2.1, 3.4]
Custom drawables
Ray allows you to create your own drawables. You can rewrite Ray::Sprite in Ruby, for example. Let’s try that. :)
class CustomSprite < Ray::Drawable
end
That subclass needs to implement its own initialize method to tell Ray how
many vertices it needs to have. You can do it like this:
def initialize(image)
  super() # Always call this
  self.image = image

  # You need to tell Ray how many vertices you're going to use.
  self.vertex_count = 4
end

attr_reader :image

def image=(val)
  @image = val

  # Whenever your vertices must be updated, call this method.
  changed!
end
Then, when Ray will try to draw your drawables, it will call two methods:
-
fill_vertices, to push the data to draw. This will (or should) happen rarely. -
render, to actually draw. You’ll need low-level OpenGL calls here.
Here’s how we would do it here:
def fill_vertices
  # Specify each vertex: position, color, texture coordinate.
  [
   Ray::Vertex.new([0,        0],        Ray::Color.white, [0, 0]),
   Ray::Vertex.new([@image.w, 0],        Ray::Color.white, [1, 0]),
   Ray::Vertex.new([@image.w, @image.h], Ray::Color.white, [1, 1]),
   Ray::Vertex.new([0,        @image.h], Ray::Color.white, [0, 1]),
  ]
end

# Ignore index for now. first is the index of the first vertex we will
# render.
def render(first, index)
  # Tell OpenGL what texture to use.
  @image.bind

  # Draw!
  Ray::GL.draw_arrays :triangle_fan, first, 4
end
If for some reason, you needed to share vertices (let’s reveal some
implementation secrets: Ray does this in Ray::Text), you could use
indices. This way, instead of passing the same vertex twice, you’d pass the
index of that vertex twice.
def initialize(image)
  # Same as before

  # Just a test. draw it using two triangles.
  self.index_count = 6
end

# fill_vertices doesn't change

# first is the same thing as in render
def fill_indices(first)
  Ray::GL::IntArray.new(first, first + 1, first + 2, first + 3,
                        first, first + 2)
end


# Now, we'll ignore first. Instead, we'll use index with draw_elements.
def render(first, index)
  Ray::GL.draw_elements :triangles, 6, index
end
Notice this class gets all the transformations other drawables have for free:
custom_sprite.pos = [100, 100] # Just works.
Custom vertices
Ray allows you to draw anything you want. If you need other vertices than the ones it uses (that teapot clearly can’t be created using 2D positions), you can create your own vertex type:
# You need to specify the name of the attribute, the name it will have in
# your shader, and  its type:
Vertex = Ray::GL::Vertex.make [
  [:pos,    "in_Position", :vector3],
  [:normal, "in_Normal",   :vector3],
  [:color,  "in_Color",    :color]
]

# Vertex is a sub-class of Ray::GL::Vertex. Accessors have been generated
# automatically.
You need to use your own shader, to apply transformations as you need. You must also tell it to use your vertex type before linking it (which means, before calling compile).
window.shader.apply_vertex Vertex
window.shader.compile :vertex => "your_vertex_shader.glsl"
Drawables must then inform Ray they will use this vertex type instead of the default one:
def initialize
  super Vertex
end

def fill_vertices
  [Vertex.new([0, 10, 20], [30, 40, 50], Ray::Color.green)]
end
Notice that trying to use one of Ray’s drawables with such a shader will simply fail.
Audio
Ray has, in addition to its rendering module, an audio module, using which sounds can be played.
Sounds are represented using two classes, the first of which is
Ray::Sound. It loads all the file in memory before playing it.
Ray::Sound.new "sound.wav"
Notice that Ray caches the buffer used by the sound, but not the sound itself. This allows to play the same sound twice at the same time (and possibly from different places):
sound("BAAAAAAAAM.wav").play
sleep 0.1
sound("BAAAAAAAAM.wav").play
The second one is Ray::Music, which doesn’t need to load the whole file to
play the music.
Ray::Music.new "music.wav"
The interfaces of those two classes are very similar. Here’s a script allowing to play a sound and exiting once it’s done:
require 'ray'

sound = Ray::Sound.new ARGV[0]
sound.play
sleep sound.duration
Sound playback can be paused and resumed or completely stopped:
sound.pause
sound.play

sound.stop
Sounds have others parameters, such as their volume (between 0 and 100) and whether they should be played in a loop or just once.
 sound.volume = 75
 sound.loop   = true
Spatialization
It is possible to give the illusion that a sound is played from a different place. All you need to do is setting a position to your sound:
sound.pos = [0, 0.5, 10]
The listener also has a position that can be changed:
Ray::Audio.pos += [3, 4, 5]